Saturday, 1 November 2025

AI@OIC - 25.10 Release


AI@OIC – 25.10

Oracle has recently introduced a suite of new AI Design features in the 25.10 release, aimed at enhancing user experience and streamlining complex workflows. In this blog post, I will delve into the specifics of these innovative tools, discuss their practical applications in professional environments, and explain how they empower users to design smarter solutions more efficiently.


Build Integrations using Natural Language

A screenshot of a computer

AI-generated content may be incorrect.


Upon selecting "Create Project," you are presented with the option to establish an integration by interacting with the chatbot interface using natural language.

A screenshot of a computer

AI-generated content may be incorrect.

Briefly describe your requirements in the chat interface. “Create an integration which pick up the new items file from an FTP and creates the items in SCM Cloud” 

A screenshot of a computer

AI-generated content may be incorrect.

If there are existing Recipes and accelerators available within OIC, you’ll have the option to select them; otherwise, you will be given the choice to start a New Project. 

A screenshot of a computer

AI-generated content may be incorrect.


Please provide the necessary information to initiate the project creation process.

A screenshot of a computer

AI-generated content may be incorrect.

Click Add to create an integration.

A screenshot of a computer

AI-generated content may be incorrect.

 Click on Create to create a new integration

A white background with black text

AI-generated content may be incorrect.

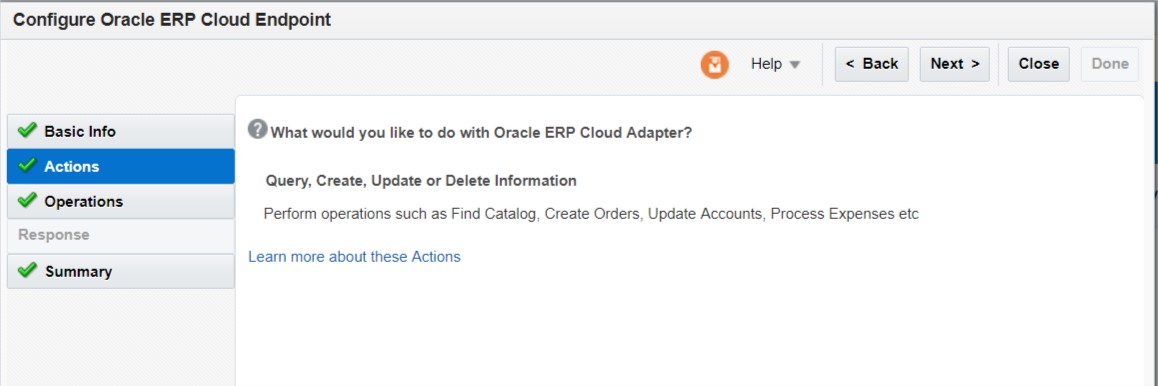
Choose your integration pattern. 

A screenshot of a application

AI-generated content may be incorrect.


Provide necessary information to create the new integration and click on create.

A screenshot of a computer

AI-generated content may be incorrect.


As you see the OIC Connection are created automatically based on the project description provided in the previous steps. Edit the Integration created by click on the Edit Option


Enter a brief description of the integration and click on the generate button.

A screenshot of a computer

AI-generated content may be incorrect.


A screenshot of a computer

AI-generated content may be incorrect.


The AI Capability available within OIC will generate the flow on the fly which can be configured as per the business needs. 

A screenshot of a computer

AI-generated content may be incorrect.


Save the integration and if you want AI to add additional capabilities then you reuse the AI Interactions section to further enhance the integration.


A screenshot of a computer

AI-generated content may be incorrect.


A screenshot of a computer

AI-generated content may be incorrect.

Click on on Thumbs up icon to accept the flow or reject the changes and keep interacting with the AI to further refine the flow.

A screenshot of a computer

AI-generated content may be incorrect.


OIC Connections will be automatically for you and you just need to configure these connections.


Additionally, documentation for the integration can be generated automatically by selecting the "Learn about this integration" option provided.

A white rectangular object with a black border

AI-generated content may be incorrect.


A screenshot of a computer

AI-generated content may be incorrect.


Click the download button to save the documentation as a .pdf, or choose to regenerate it.

A screenshot of a computer

AI-generated content may be incorrect.


The screen below shows the sample documentation generated.

A screenshot of a computer

AI-generated content may be incorrect.


These enhancements enable users to create intelligent and efficient solutions with minimal manual configuration, utilizing AI to optimize and customize integration workflows. I am looking forward to the developments planned for future releases.


Friday, 3 April 2020

VBCS Excel Plugin To Load Data into Oracle SaaS

In this article i will explain how to make use of the Oracle VBCS Plugin for Excel and Oracle SaaS REST Services to load data into Oracle SaaS cloud

For those who are not aware of what VBCS is, i would recommend reading through the below article
https://blogs.oracle.com/smb/what-is-visual-builder-and-why-is-it-important-for-your-business

Oracle SaaS Cloud does offer different mechanisms for importing the the data from various systems.
Some of the commonly used approaches are as given below
  • FBDI Templates 
  • SOAP / REST Services
In this example i will make use of the SCM REST Service and VBCS Plugin to create serial numbers in inventory. The steps are as detailed below.
  1. Download the VBCS Excel Plug-in and install it. The plugin can be downloaded from https://www.oracle.com/downloads/cloud/visual-builder-addin-downloads.html
  2. Open excel and after the successful installation of the plugin, you should be able the menu item in the excel.
  3. Click on the Designer icon and enter the SCM REST Service Details as shown below and click on ok.
  4. Enter the Cloud login credentials 
  5. After signing in, Select the business object as shown and click on ok.
  6. Select the Table Layout and click on ok.
  7. A layout would be generated by the VBCS Plugin as shown below.
  8. Edit the layout if required and redraw the layout to view the changes. For this example there are only 3 mandatory values required by the service.
  9.  I have edited the layout to include the mandatory fields and entered the details of the OrganizationId, InventoryItemId and SerialNumber (which is to be created in Oracle) as shown below.
  10. Click on Upload Changes to create the serial number in SCM.
  11. Once the data is posted successfully the status would be updated in the record.
  12. Now to navigate to SCM Cloud and view the details of the serial number created.

Tuesday, 5 March 2019

Expose Web Service as REST API using Oracle Integration Cloud

Exposing Web Service as REST API

Oracle Fusion ERP Cloud provides numerous Web / REST Services for integration and with each release Oracle is adding more and more services.  I have come across scenarios where you have a Web Service available for integration but don't have the equivalent REST Service available.

This might be a problem when you are developing custom applications in VBCS as VBCS can only work with REST Services at this point of time. To overcome this problem, we can leverage Integration Cloud and expose the Web Service as REST API.

In this post I will provide details around how to expose Web Services as REST API using OIC.

Create a REST Connector and Configure the Connection / Security details.


Create an Oracle ERP Cloud adapter and Configure the Connection / Security details.


Create a new Integration and Select Basic Routing Style.


Enter the relevant integration details after selecting the style (Integration Name, Identifier, Description and Package Details)

Select the REST Connector and drop it on the Trigger Section and Enter the details as shown below.


Click on next to configure the Request details of the service.


I have used the below JSON data to configure request.

{ "OrganizationCode" : "XX", "ItemClass" : "Root Item Class", "ItemNumber" : "Test Demo Item - 001", "ItemDescription" : "Test Demo Item - 001", "ItemStatusValue" : "Active", "LifecyclePhaseValue" : "Production", "PrimaryUOMValue" : "Each" }

Click on Next to configure the Response details.


I have used the below JSON data for configuring the response.

{  "ItemId" : 999994000402981,     "OrganizationId" : 111,     "OrganizationCode" : "XX",     "ItemCatalogGroupId" : 100000011369001,     "ItemClass" : "Root Item Class",
..................}

Now select the Oracle ERP Cloud adapter and drop it in the Invoke section and add the details as shown below.


Now add the mapping for request (mapping data between REST and ERP Cloud connector) and response (mapping data from ERP Cloud to REST Connector) as shown below.


Add the business identifier details for tracking.


Save the changes and activate the application.
Copy the Endpoint details as shown below (this endpoint will provide the metadata details).


Open the browser and enter the copied end point from previous step. The Endpoint will display the details below.

Copy the details under Endpoint URL.

Open SOAP UI and copy the Endpoint URL.
Select the method as POST and enter the details of the item to be created in the Request section.
Submit the request and the item will be created successfully in Oracle ERP Cloud.


The details of the item created in Oracle ERP Cloud are as shown below.


Saturday, 2 March 2019

Create RESTful services with Oracle DBCS

In this post I will provide an overview of how to expose the data from Oracle DBCS via RESTful services. This is a common scenario where the customer would like to store large volumes of data in DBCS and leverage other Oracle PaaS products to build custom applications (ex : VBCS comes with a limited internal storage capacity to overcome this limitation we can leverage DBCS and expose the data via RESTful services)


I have created a schema and added the EMP table for the table as shown below.

EMP
===
create table emp(  
  empno    number(4,0),  
  ename    varchar2(10),  
  job      varchar2(9),  
  mgr      number(4,0),  
  hiredate date,  
  sal      number(7,2),  
  comm     number(7,2),  
  deptno   number(2,0),  
  constraint pk_emp primary key (empno),  
  constraint fk_deptno foreign key (deptno) references dept (deptno)  
);

Populate the EMP table with some sample data.

Now navigate to APEX and select SQL Workshop > RESTful Services


Create a new module by providing the relevant details.


After the module is created click on the Create Template button at the bottom of the page.


Enter the details as shown below and create the template

After the template has been created, click on Create Handler.


Under Handler section specify the method, source type, format and source options and click on create handler.


Now copy the Full URL Path and navigate to a browser and place the copied path.

The GET method will query the underlying EMP Table exposes the data in JSON format.
Similarly, we can created handlers for other methods as well.


By default authentication is not enabled in ORDS. Do refer the Authentication section for the options available.